|
Bean Scopes
By default Spring beans are singleton, that is to say that only one instance of each bean is created. Repeated attempts to get the bean always returns the same (one and only) bean instance.
Sometimes an application requires that each request for a bean return a new instance. This is known as a prototype scope in Spring.
When working with web applications, it is quite common to mark some beans as having a session scope. In this way, each user has a separate collection of beans.
Special attention needs to be given to mixing scopes. For example, injecting a prototype bean into a singleton bean, as a property does not magically provide a new bean each time a call is made. This is because the prototype bean is only injected once by Spring into the singleton scoped bean, when the bean is created..
Spring's method lookup needs to be used when using prototype beans from within a singleton bean. In this way the developer can control when a new instance is required, and when it is not.
In this section, the source code from the previous section is used to add the method lookup mechanism.
Download CGLib.jar
Spring's method lookup is used to replace a class' abstract method with some code, in effect, dynamic code generation comes into play.
In order for dynamic method generation to work in Spring, a third party library needs to be downloaded and added to the project. CGLib can be downloaded from sourceforge. At the time of writing, this link provides access to CGLib.
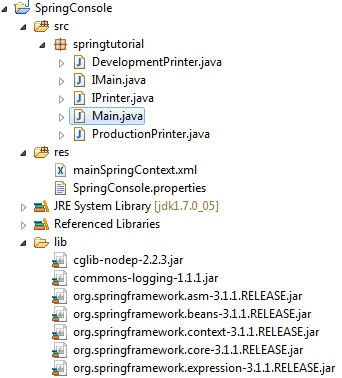
The CGLib jar is added to the project described in a previous section. The project tree is now as shown below:
The application context file is edited to replace the mainApp property printer with a method lookup.
mainSpringContext.xml
<?xml version="1.0" encoding="UTF-8"?>
<beans
 xmlns="http://www.springframework.org/schema/beans"
 xmlns:context="http://www.springframework.org/schema/context"
 xmlns:xsi="http://www.w3.org/2001/XMLSchema-instance"
 xsi:schemaLocation="
   http://www.springframework.org/schema/beans
   http://www.springframework.org/schema/beans/spring-beans-3.1.xsd
   http://www.springframework.org/schema/context
   http://www.springframework.org/schema/context/spring-context-3.1.xsd
 ">

 <context:property-placeholder location="classpath:SpringConsole.properties"/>

 <bean id="devPrint" class="springtutorial.DevelopmentPrinter"/>
 <bean id="prodPrint" class="springtutorial.ProductionPrinter"/>
 <alias alias="printer" name="${printer}"/>

 <bean id="mainApp" class="springtutorial.Main">
   <property name="springWiredProperty"
     value="This value is defined in the Spring Context"/>
   <lookup-method name="getPrint" bean="printer"/>
 </bean>
</beans>
|
In effect the lookup-method element instructs Spring to return the printer bean every time the getPrint() method is called.
The properties file SpringConsole.properties is edited to use the devPrint bean as the printer bean:
SpringConsole.properties
| printer=devPrint |
The DevelopmentPrinter class is altered to output a count of lines printed:
DevelopmentPrinter.java
package springtutorial;

public class DevelopmentPrinter implements IPrinter {
	private int lineNumber;

	@Override
	public void print(String line) {
		System.out.print("Development["+ lineNumber++ +"]: ");
		System.out.println(line);
	}

}
|
The class Main is edited as shown below.
Main.java
package springtutorial;

import org.springframework.context.ApplicationContext;
import org.springframework.context.ApplicationContextAware;
import org.springframework.context.support.ClassPathXmlApplicationContext;

public abstract class Main implements IMain {
	private String springWiredProperty;

	// Lists the files in which Spring beans are defined:
	private static final String[] SpringConfigLocations =
		{"mainSpringContext.xml"};

	public static void main(String[] args) {
		ClassPathXmlApplicationContext context = new ClassPathXmlApplicationContext(SpringConfigLocations);
		IMain main = (IMain) context.getBean("mainApp");
		main.go();
	}

	@Override
	public void go() {
		IPrinter aPrinter = getPrint();
		aPrinter.print("It works " + springWiredProperty);
		aPrinter.print("a second line");

		IPrinter anotherPrinter = getPrint();
		anotherPrinter.print("this is printed from the second call to get the printer bean");
	}

	public String getSpringWiredProperty() {
		return springWiredProperty;
	}

	public void setSpringWiredProperty(String springWiredProperty) {
		this.springWiredProperty = springWiredProperty;
	}

	public abstract IPrinter getPrint();
}
|
- The class is made abstract because an abstract method is used to replace the getPrint() and setPrint() methods.
- The go() method is expanded to illustrate the difference between singleton and prototype scoped beans. This is achieved by requesting two IPrinter beans from Spring.
	@Override
	public void go() {
		IPrinter aPrinter = getPrint();
		aPrinter.print("It works " + springWiredProperty);
		aPrinter.print("a second line");

		IPrinter anotherPrinter = getPrint();
		anotherPrinter.print("this is printed from the second call to get the printer bean");
	}
|
- The abstract method getPrint() is added at the bottom of the file, and setPrint() is removed.
The application is run, and the console ends by displaying the lines:
Development[0]: It works This value is defined in the Spring Context
Development[1]: a second line
Development[2]: this is printed from the second call to get the printer bean
|
The above is what one would expect of a singleton DevelopmentPrinter bean: the line numbers go from zero to two.
Changing the Scope to Prototype
In the application context xml file, the bean devPrint is changed to prototype scope.
mainSpringContext.xml
...
...
<bean id="devPrint" class="springtutorial.DevelopmentPrinter" scope="prototype"/>
...
...
|
The application is run, and the console's last few lines display:
Development[0]: It works This value is defined in the Spring Context
Development[1]: a second line
Development[0]: this is printed from the second call to get the printer bean |
The above shows that anotherPrinter.print() is using a new bean instance, the line number output is zero for the second bean instance.
The source code for this example can be found here.
Conclusion
So far this article has explained how to set up a Spring console project, and configure the Spring components using an xml application context file. A property file and an xml file are used to configure the application. The prototype and singleton scopes have been explained.
Is is easy to imagine large projects becoming bathed in swathes of xml configurations: each bean needs to have an entry in one or more xml application context files. This can soon become quite complex. As an added problem, one mistype in the xml, and the application can stop working when least expected.
As of Spring version 3, Spring also supports annotation based configuration. In effect, the amount of XML based configuration is entirely up to the developer's choosing.
The next section delves into Spring annotations by writing a Spring framework project that uses no xml configuration files..
|